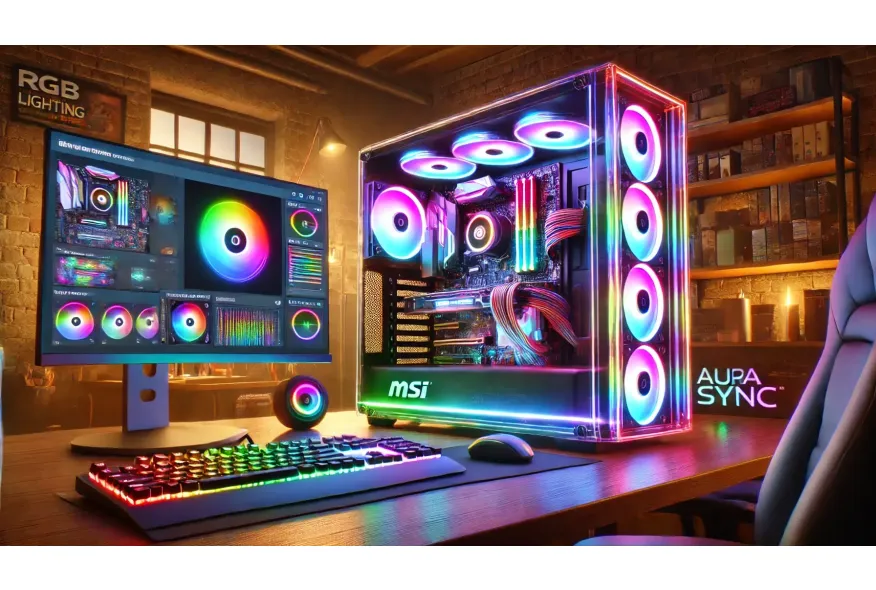

How to Set Up RGB Lighting on Your Motherboard and PC Case
Why RGB Lighting Matters for Your Setup
RGB lighting has become a signature feature of modern gaming setups. Whether you want to create a futuristic gaming station or a minimalist glow, configuring the RGB on your motherboard and PC case is crucial for achieving the perfect look. But for beginners, setting up and syncing RGB lights can be confusing due to different connectors, software, and compatibility issues.
This guide will teach you everything you need to know about configuring RGB lighting on your motherboard and case to ensure a smooth, visually stunning result.
Understanding RGB vs ARGB - What’s the Difference?
RGB (Standard)
- Supports single color per strip/zone at a time.
- Usually uses a 4-pin 12V connector.
- Works with basic lighting effects, like static, breathing, and cycling.
ARGB (Addressable RGB)
- Supports individual control of each LED for more advanced effects.
- Uses a 3-pin 5V connector.
- Allows for rainbow effects, animations, and custom patterns.
Tip: Always check if your motherboard and case RGB fans/strips use RGB or ARGB — they are not interchangeable.
What You’ll Need
Before starting, make sure you have:
- Motherboard with RGB/ARGB headers.
- Case with pre-installed RGB fans/strips (or separately purchased RGB accessories).
- Compatible RGB control software (depends on motherboard brand).
- Cables and adapters (if mixing brands or types of RGB devices).
Step 1: Locate RGB Headers on Your Motherboard
Check the manual to find the exact location of RGB or ARGB headers.
Headers are usually labeled as:
- RGB_HEADER for 12V RGB.
- ARGB_HEADER for 5V addressable RGB.
Verify compatibility: Your case’s RGB fans and strips must match these headers.
Step 2: Connect RGB Cables to the Motherboard
Standard RGB (4-pin 12V)
- Align the arrow on the cable with pin 1 (marked 12V) on the header.
- Connect all compatible fans/strips to the same header (using splitters if necessary).
Addressable RGB (3-pin 5V)
- Align the arrow on the cable with the 5V pin.
- Do not force a 4-pin connector into a 3-pin header (and vice versa).
Step 3: Install RGB Control Software
Each motherboard brand provides its own RGB software. Download the correct one:
- ASUS: Aura Sync
- MSI: Mystic Light
- Gigabyte: RGB Fusion
- ASRock: Polychrome RGB
Pro Tip
If your case or fans use a proprietary controller, you may also need additional software (like Corsair iCUE or Lian Li L-Connect).
Step 4: Set Up and Sync RGB Effects
- Open your motherboard’s RGB software.
- Choose whether to control each zone separately or sync all components.
- Test effects like:
- Static color
- Breathing
- Rainbow wave
- Music or game reactive
Case Fans with Controllers
If your case comes with its own RGB controller, you might need to control it separately from the motherboard (unless the controller supports motherboard sync).

Common Compatibility Issues and Fixes
| Problem | Cause | Solution |
|---|---|---|
| Lights not turning on | Wrong header or cable reversed | Check header type and alignment |
| Only single color works | Mixed RGB/ARGB components | Use correct headers for each |
| Software not detecting device | Outdated firmware/drivers | Update BIOS and RGB software |
| Colors unsynchronized | Conflicting software | Use only one RGB app |
Advanced Tip - Using Third-Party Sync Tools
If you have a mix of brands (for example, ASUS motherboard and Corsair fans), you can use third-party apps like:
- OpenRGB - Open-source universal RGB control.
- SignalRGB - Supports many brands in a single interface.
Example Setup - Full RGB Build
Components:
- Motherboard: MSI B650 Tomahawk (Mystic Light)
- Case: Lian Li Lancool III with ARGB fans (L-Connect)
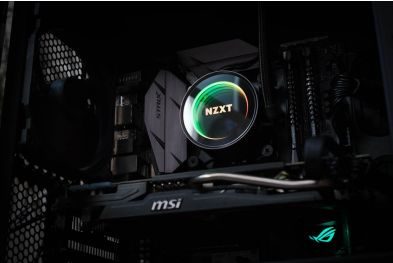
- CPU Cooler: NZXT Kraken RGB (NZXT CAM)
Recommended Approach:
- Sync all motherboard-connected RGB via Mystic Light.
- Control cooler RGB via NZXT CAM.
- Sync case fans via L-Connect, or bridge them to the motherboard if supported.
How to Sync RGB with Your Peripherals
If you want your keyboard, mouse, and headset to match your case and motherboard lighting:
- Use motherboard software if peripherals support it.
- For brands like Corsair, use iCUE to link everything (including compatible components).
- Some motherboards support Razer Chroma Sync, allowing you to link to Razer peripherals.
Quick Troubleshooting Guide
| Issue | Quick Fix |
|---|---|
| Lights flickering | Check power cables |
| Missing effects | Update RGB software |
| Random disconnects | Re-plug headers and restart |
Final Touch - Customize to Your Style
Once everything is working, experiment with:
- Color themes matching your wallpaper.
- Reactive lighting tied to game audio.
- Seasonal effects (spooky orange for Halloween, red/green for Christmas).
Balanced RGB - Less is More
RGB is fun, but overdoing it can hurt aesthetics. If you’re aiming for a clean look, consider using:
- Single color per component (white, blue, red).
- Subtle underglow instead of bright direct lighting.
- Matte or tinted panels to diffuse the light softly.
Conclusion - Your Setup, Your Style
With your motherboard RGB and case lighting properly configured, your gaming PC will not only perform well but also look stunning. Whether you prefer a subtle glow or full-on rainbow madness, controlling and syncing your RGB allows you to express your personality through your setup.