
How to Clean Your PC Properly and Avoid Common Issues
A clean PC isn’t just about aesthetics—it’s essential for performance, longevity, and reliability. Dust buildup, debris, and poor airflow can lead to overheating, reduced efficiency, and even hardware failure. In this guide, we’ll walk you through the steps to clean your PC properly and keep it running smoothly.
Why Clean Your PC Regularly?
Prevent Overheating: Dust clogs fans and heatsinks, causing components like the CPU and GPU to overheat.
Extend Hardware Lifespan: Clean components last longer and perform better.
Improve Performance: Proper airflow ensures your PC runs efficiently, avoiding thermal throttling.
Reduce Noise: Dusty fans work harder, increasing noise levels.
Tools You’ll Need
Compressed Air: For blowing dust out of components.
Microfiber Cloths: For wiping surfaces without scratching.
Isopropyl Alcohol (70%+): For cleaning thermal paste and stubborn grime.
Soft-Bristle Brush: For gently dislodging dust.
Screwdriver: For opening the case (if needed).
Anti-Static Wrist Strap (optional): To prevent static damage.
Step-by-Step Guide to Cleaning Your PC
1. Prepare Your Workspace
Turn off your PC and unplug all cables.
Work in a well-ventilated area to avoid inhaling dust.
Ground yourself by touching a metal object to prevent static discharge.
2. Clean the Exterior
Wipe the case, monitor, keyboard, and mouse with a microfiber cloth lightly dampened with water or isopropyl alcohol.
Use compressed air to blow dust out of USB ports, vents, and crevices.
3. Open the Case
Remove the side panel(s) using a screwdriver (if necessary).
Avoid touching sensitive components like the motherboard or GPU directly.
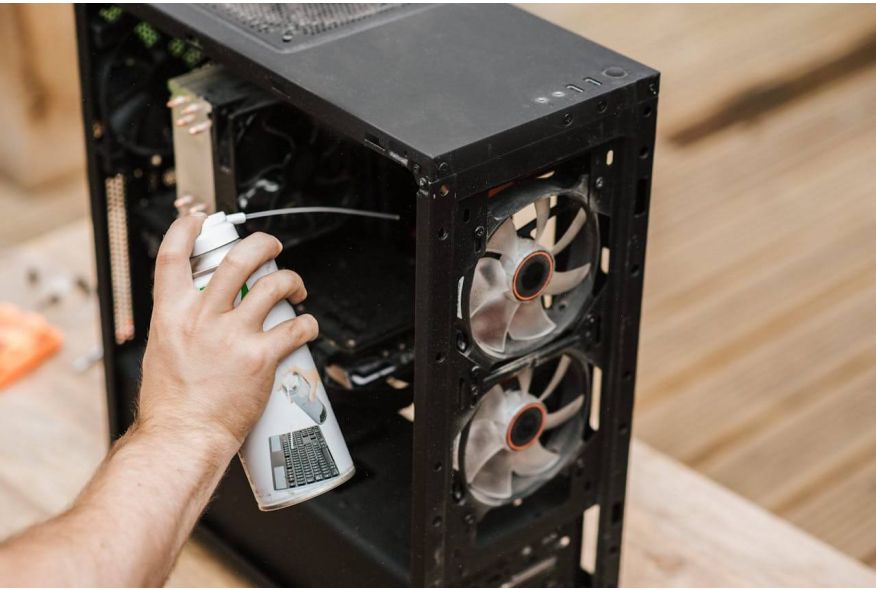
4. Remove Dust from the Interior
Fans: Hold fan blades in place and use compressed air to blow dust off.
Heatsinks: Clean the CPU and GPU heatsinks thoroughly.
Power Supply: Blow air through the PSU vents (do not disassemble it).
Cables and Components: Use a soft-bristle brush to loosen dust, then blow it away with compressed air.
5. Clean the GPU and CPU
Remove the GPU (if comfortable) and clean its fans and heatsink.
Reapply thermal paste to the CPU if you’re removing the cooler for deep cleaning.
6. Check Filters and Vents
Clean or replace dust filters (common in modern cases).
Ensure vents and airflow paths are unobstructed.
7. Reassemble and Test
Reattach side panels and reconnect all cables.
Power on your PC to ensure everything works properly.
Tips for Safe Cleaning
Avoid Liquids: Never spray liquids directly onto components.
Don’t Use a Vacuum: Vacuums create static electricity, which can damage parts.
Be Gentle: Use light pressure to avoid bending pins or breaking connectors.
How Often Should You Clean Your PC?
Every 3–6 Months: For average home users.
Every 1–2 Months: If you have pets, smoke, or live in a dusty environment.
Monthly: For high-performance PCs or gaming rigs.
Signs Your PC Needs Cleaning
Loud Fan Noise: Indicates dust buildup or overheating.
Frequent Overheating: Check temperatures using tools like HWMonitor.
Slow Performance: Dust can cause thermal throttling.
Visible Dust: Dust on vents or inside the case is a clear sign.
Final Thoughts
Regular cleaning is a simple yet effective way to maintain your PC’s performance and extend its lifespan. By following this guide, you can prevent common issues like overheating, hardware damage, and unexpected crashes.
Take the time to clean your PC properly, and it will reward you with reliable, efficient performance for years to come.
Reminder:
Found this guide helpful? Share it with your friends and fellow PC users on social media! Let’s help everyone keep their systems clean and running smoothly. 🚀
By following these steps, you’ll ensure your PC stays clean, cool, and efficient. Happy cleaning!